Introduction:
Are you sick of struggling with the oppressive heat in the summer? Look no further than the Mr. Cool Mini Split system. With its energy-efficient cooling capabilities, this innovative system can provide the comfort you need without breaking the bank. But how do you install Mr. Cool Mini Split? Don’t worry; we’ve got you covered with this step-by-step guide.
Installation Mr. Cool Mini Split: Step-by-Step:
Step 1: Planning:
The first step in any installation process is careful planning. Start by measuring the area you want to cool or heat. This will enable you to pick the right-sized unit that you require. Next, decide on the location for the indoor and outdoor units. Make sure there is enough space and proper ventilation for the outdoor unit.
Step 2: Gather The Tools And Materials:
Gather all the required equipment and materials before you start the installation. You will need a condensate drain line, refrigerant lines, electrical wires, a level, a drill, a screwdriver, a wrench, and mounting brackets. Make sure you have everything you need before you start.
Step 3: Install The Indoor Unit:
Start by installing the mounting bracket for the indoor unit. Use a level to ensure it is straight. Next, drill a hole in the wall for the refrigerant lines and electrical wires. Following the manufacturer’s instructions, connect the lines and wires to the indoor unit. Finally, mount the indoor unit on the bracket and secure it.
Step 4: Install The Outdoor Unit:
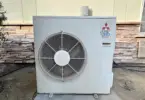
Find a suitable location for the outdoor unit. It should be on a stable surface and have proper clearance for airflow. Install the mounting bracket and secure the outdoor unit to it. Connect the refrigerant lines and electrical wires to the outdoor unit. Make sure all connections are tight and secure.
Step 5: Connect The Refrigerant Lines:
Run the refrigerant lines from the indoor unit to the outdoor unit. Make sure to insulate the lines to prevent any heat loss or gain. Connect the lines to the appropriate ports on both units. Again, refer to the manufacturer’s instructions for the correct procedure.
Step 6: Connect The Electrical Wires:
Connect the electrical wires from the indoor unit to the outdoor unit. To ensure good connections, adhere to the wiring schematic that the manufacturer has provided. Before handling any electrical cables, be sure to turn off the power.
Step 7: Install The Condensate Drain Line:
Install a condensate drain line to remove any excess moisture from the indoor unit. This will stop mold growth and water damage. Connect the drain line to the indoor unit and direct it to a suitable drainage location.
Step 8: Test The System:
Once everything is installed, it’s time to test the system. Turn on the power and set the temperature on the remote control. The Mr. Cool Mini Split should start cooling or heating the room. Check for any leaks or unusual noises. If everything is working correctly, congratulations!
Frequently Asked Questions:
Why Is Proper Installation Necessary?
Proper installation ensures the system operates efficiently and effectively, providing comfort while minimizing energy costs.
Can I Install A Mr. Cool Mini Split System Myself?
While it’s possible for experienced DIYers, professional installation is recommended to ensure safety and optimal performance.
How Do I Maintain The System After Installation?
Regular maintenance includes cleaning filters and coils, inspecting for debris, and keeping the unit in good condition.
When Should I Seek Professional Help During Installation?
Contact a professional if you encounter electrical or refrigerant-related issues or need clarification on any aspect of the installation process.
Conclusion:
While the installation process of the Mr. Cool Mini Split system can indeed be approached as a DIY project with the appropriate tools and guidelines, it’s paramount to acknowledge the importance of safety and precision, particularly in tasks involving electrical wiring and HVAC components. For those who may lack confidence or experience in such technical areas, opting for professional installation services is strongly advised. Not only does this ensure the system’s correct setup, but it also guarantees the safety of both the installer and the occupants. By entrusting the installation to qualified professionals, you can rest assured knowing that your Mr. Cool Mini Split will deliver optimal performance, efficiency, and longevity, providing you with the ultimate comfort and energy-saving benefits for years to come. So, whether you choose the DIY route or opt for professional assistance, embrace the cooling relief and cost-effective operation that the Mr. Cool Mini Split system brings to your home.
Disclosure: We may get commissions for purchases made through links in this post.


